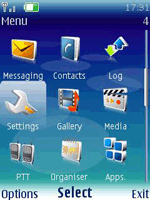
- Click the 'Menu' key and open the 'Settings' folder.
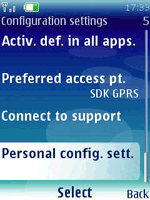
- Select 'Configuration'.
- Select 'Personal config. sett.'.
- From the 'Options' menu select 'Add new'.
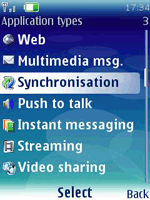
- Select 'Synchronization' and enter the following values:
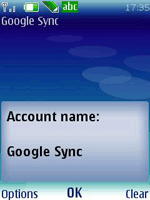
- Account name: Google Sync (or any other name of your choice)
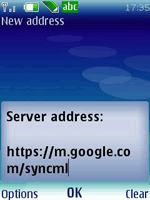
- Server address: https://m.google.com/syncml
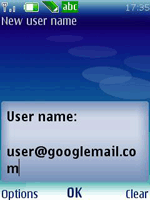
- User name: your Google Account username, e.g. you@googlemail.com
- Password: your Google password
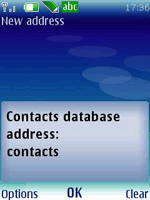
- Click on 'Contacts database'
- Enter 'contacts' into the 'Database address field'.
- Leave other fields empty and click 'Back' to save your settings.
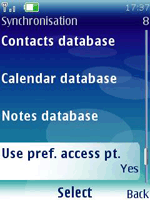
- Ensure that 'Calendar database' and 'Notes database' fields are empty.
- Ensure that 'Use pref. access pt.' is set to 'Yes'.
- Click 'Back' to exit this screen and save your settings.
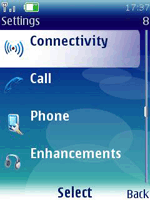
- Click 'Back' twice to the main 'Settings' screen.
- Scroll up to and open the 'Connectivity' settings.
- Select 'Data transfer'.
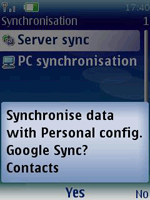
- Select 'Server sync' and when asked 'Synchronize selected data?...', click 'Yes'.